Till recently I was completely indifferent about red velvet cake, while it is truly North American dessert and here in Europe red velvet can be found in bakeries and cafes very rarely. And to be completely honest, I was afraid of eating cake with red layers, because it seemed very unnatural and I just couldn't imagine what taste it could possibly have. However, not long ago I was lucky to come upon red velvet cake for the first time and I was just blown down with it! I had no idea that this cake can be so good. It is not simply a chocolate cake, it has a distinguishing flavor and texture, unlike any other. I knew the next cake I bake definitely will be a red velvet.
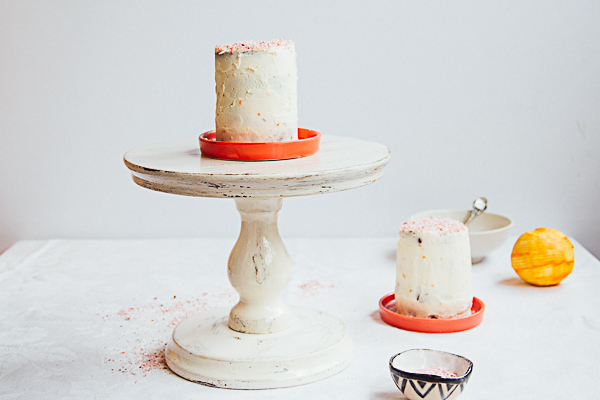
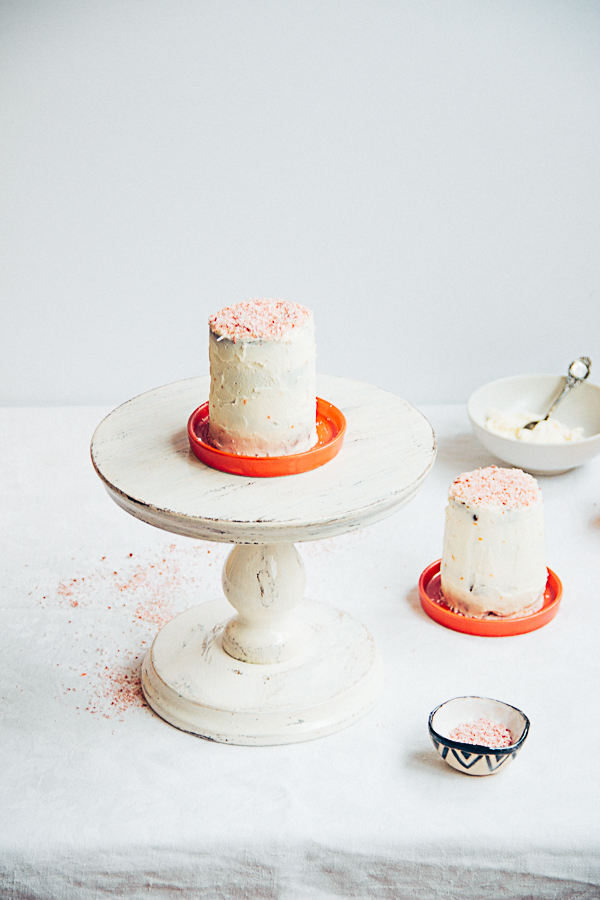
You know that I don't need a reason to bake a cake, but since the Valentine's Day is just around the corner...red velvet cake seemed to be a perfect thing to bake. Also I didn't want to make a giant cake and waste huge amount of ingredients. Plus, I was not sure whether it turns out eatable good. So, I had an idea of making mini cake for two. How great is that?! Especially when you need only two 400 ml (14 oz) cans to bake the layers! I adore this idea. And I am sure I will make more mini cakes.
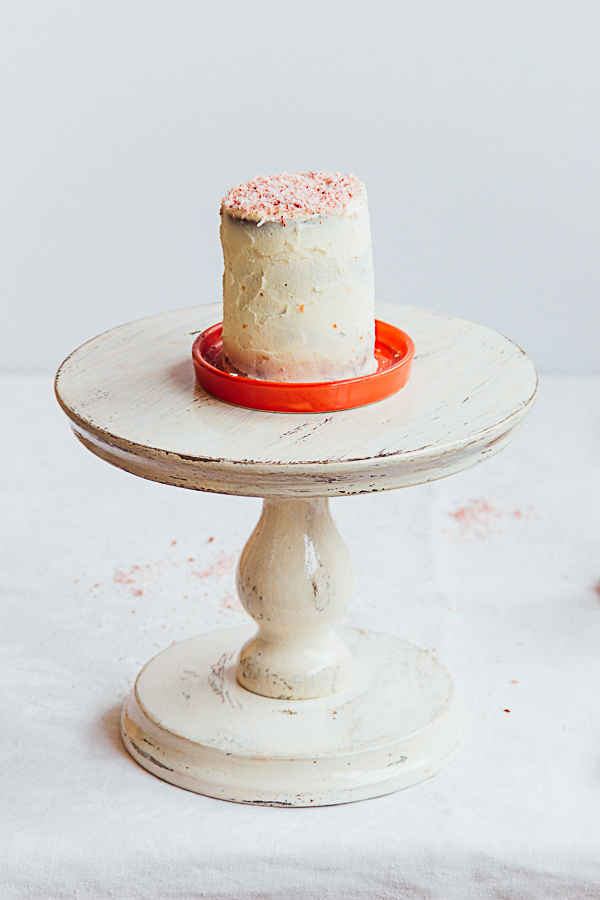
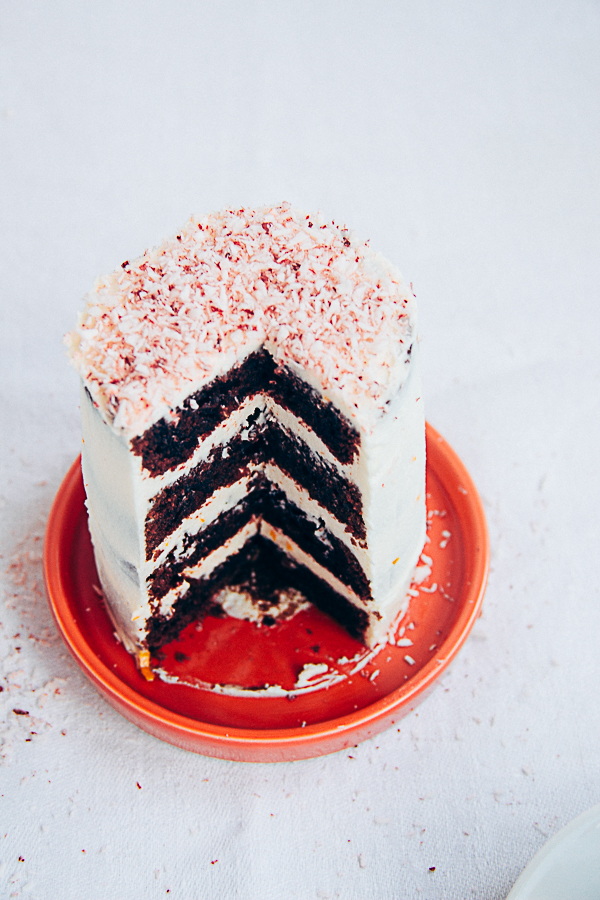
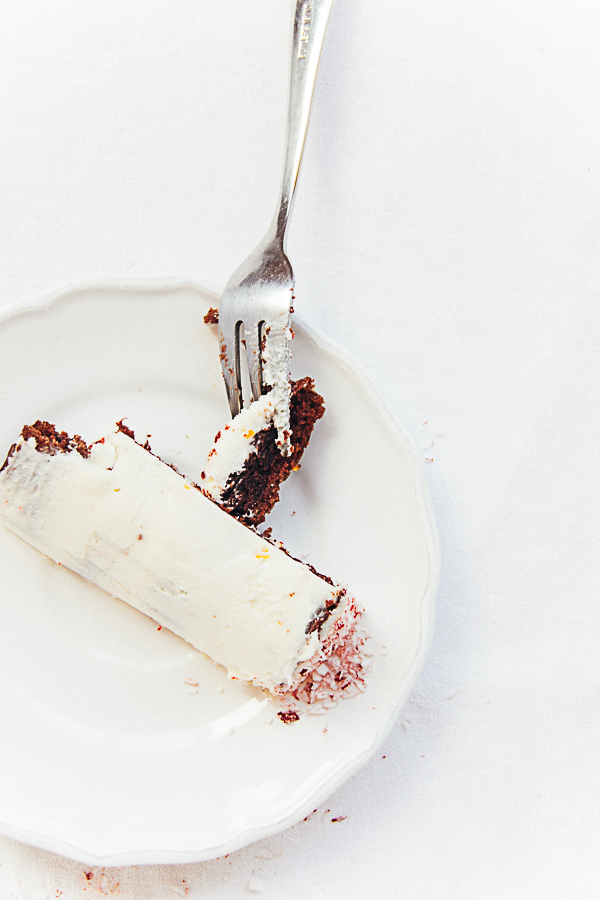
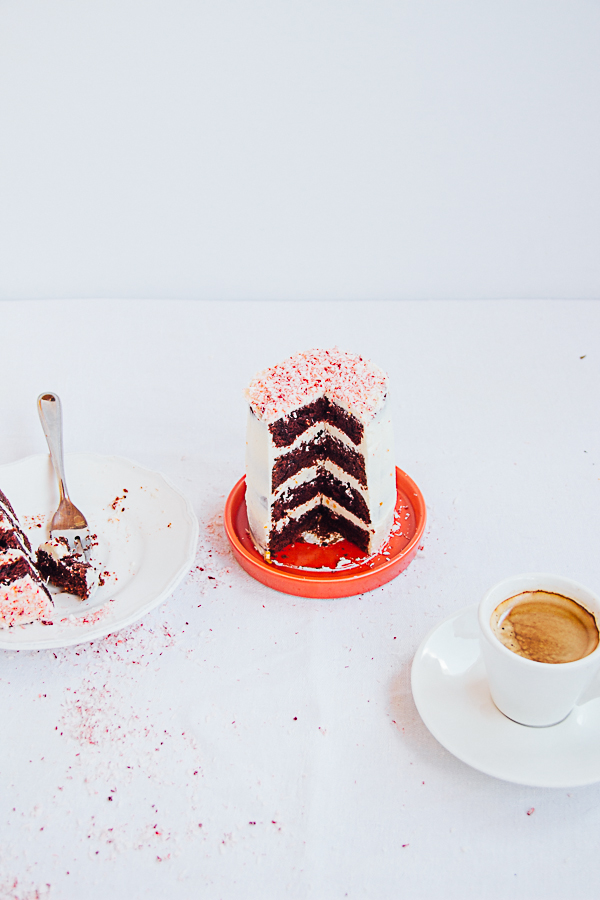
So, the cake not just turned out eatable good, it was fantastic! Moist, crumbly layers and a delicate cream cheese frosting both with a hint of orange (inspired by naked red velvet cake by Michelle, which looks magnificent, by the way!). One of the best cakes I have made so far. The recipe makes two mini cakes 8 cm (3 inch) in diameter each. But you can divide ingredients in two to make just one mini cake.
RED VELVET CAKE MINI
makes two 3-inch (8cm) cakes, serves 8
Ingredients
cake layers
95 g all purpose flour
10 g cocoa powder
1/4 tsp salt
1/4 tsp baking powder
70 g sugar
1 egg
120 ml vegetable oil
zest of 1/2 small orange
1 tbsp red food coloring
1 tsp vanilla extract
80 ml buttermilk
1/2 tsp baking soda
1/2 tsp vinegar
cream cheese frosting
200 g cream cheese, room temperature
70 g butter, room temperature
70 g powdered sugar
zest of 1/2 small orange
1 tsp vanilla extract
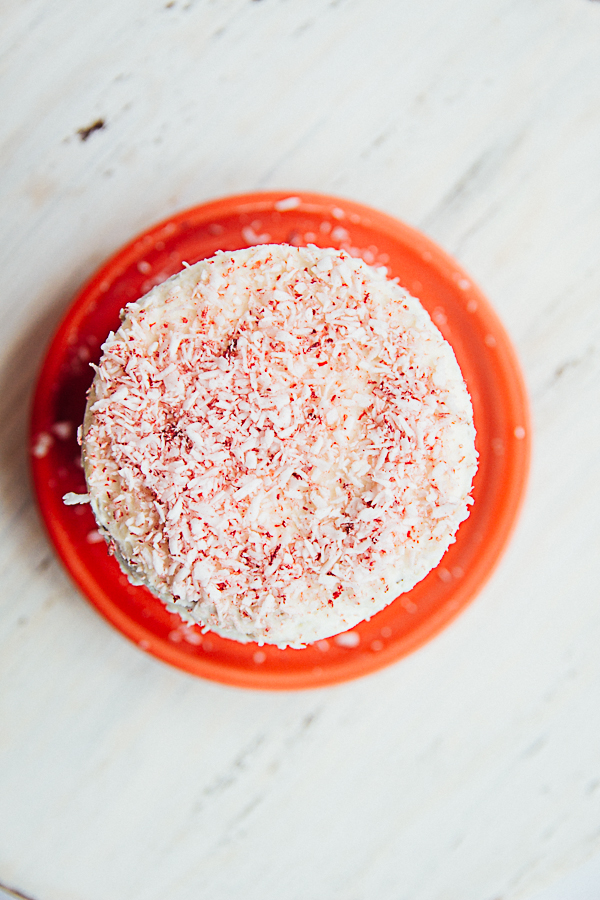
colored coconut
1/4 cup shredded coconut
2 drops of gel food coloring
extras
two 14 oz (400 ml) cans
Instructions
To make the cake layers
1. Preheat the oven to 180°C (350 F). Line and grease bottom and sides of two cans, make sure that the parchment comes a littl above the cans to make the removal easier.
2. In a medium bowl whisk flour, cocoa powder, baking powder and salt.
3. In a larger bowl whisk or a bowl of a mixer, beat sugar and oil. Beat in one egg. Add orange zest, vanilla and food coloring. Add flour mixture alternating it with buttermilk.
4. In a small bowl combine baking soda and vinegar. Add to the batter and beat until well combined. Divide the batter between two prepared cans. Bake for 35-40 minutes.
5. Let cool in the cans for 30 minutes before turning out to cool completely. Once cooled, level the tops and slice each cake in four even layers.
To make cream cheese frosting
1. Beat together the butter and powdered sugar. Add the cream cheese and beat until smooth and creamy. Beat in orange zest and vanilla extract until just incorpoated.
To make colored coconut
1. Put shredded coconut into a small bowl, add 2 drops of gel food coloring and mix to distribute the color. You can mix with a spoon or fork, but the hands will do a better job here (just be sure to wash your hands as quick as possible)
To assemble
1. Since layers are crumbly and airy, it will be easier to frost the cake when the layers are chilled. So, I recommend baking the layers the day before assembling, wraping the cooled layers in a plastic wrap and refrigerating overnight.
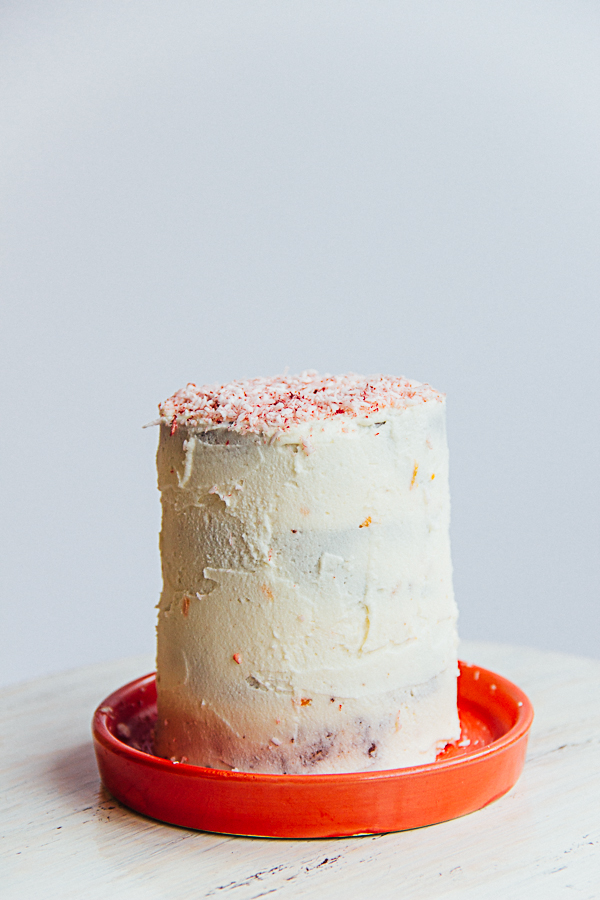
2. Layer the cakes with a frosting and make a crumb coat. Chill for 20 minutes and finish the cakes with a heavier coat of fosting.
3. Decorate with colored shredded coconut
No comments:
Post a Comment